 ::.. =[]= ..::
  ::.. =[]= ..::
  ::.. =[]= ..::

Internet Relay Chat (IRC) with Off the Record (OTR) Encryption Background
More and more, governments and corporations attempt to read your personnel network communications. From the illegal wiretaps by National Security Agency (NSA) to Sweden’s new law requiring all network traffic orginating to or from Sweden be archived, no one is safe. A recent study even showed one out of every three system administrators viewed resources, including your private data, to which they were not allowed access. Being these individuals have access to the network path, network based encryption can not be the only answer (think MitM attacks). Fortunately, Off-the-Record (OTR) messaging provides a solution around this issue.
OTR provides four major points to help ensure private conversations: encryption, authentication, deniability and perfect forward secrecy. This page discusses these points in greater detail. Most people associate OTR with instant messaging (IM). However, IRC is also capable of using OTR. Currently there are two options which allow OTR over IRC. The first is Pidgin. The second is irssi.
Installation and Configuration Pidgin
The first step is to download the latest version of pidgin from pidgin homepage. Then download theOff-the-Record Messaging plugin for pidgin.
Installing Plugins
Windows
- Download, and if necessary, extract the .dll file.
- Move the resulting file to %APPDATA%\.purple\plugins
Now when you open the Plugins dialog in Pidgin or Finch, the plugin should show up.
Unix/Linux
- Download, and if necessary, extract the .so file.
- Move the resulting file to ~/.purple/plugins
Now when you open the Plugins dialog in Pidgin or Finch, the plugin should show up.
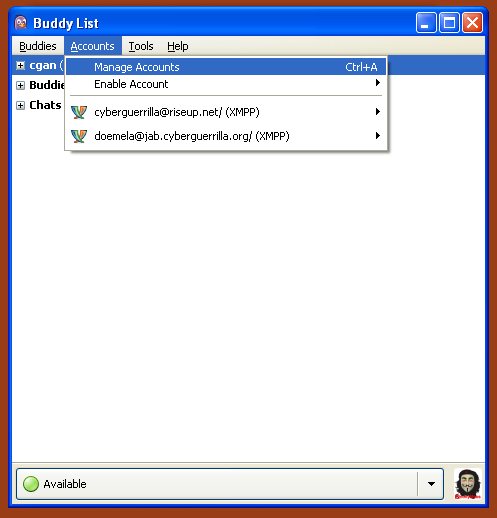
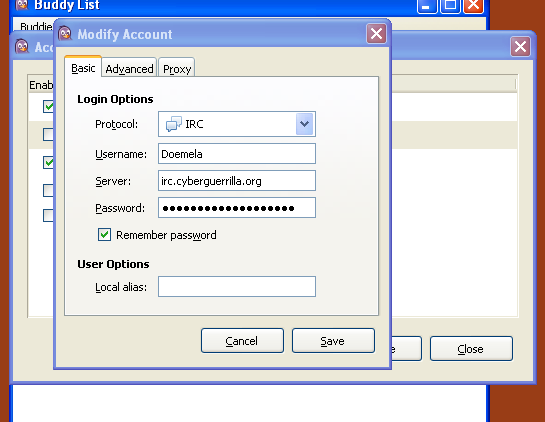
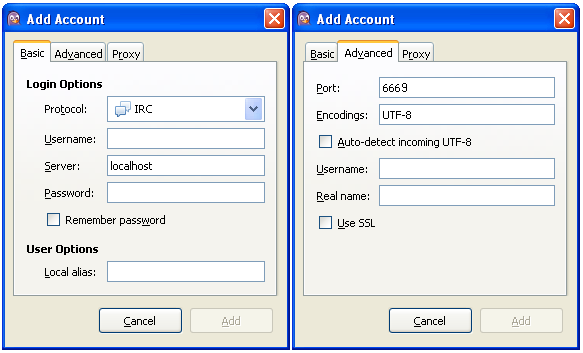
Connecting to IRC
|
|
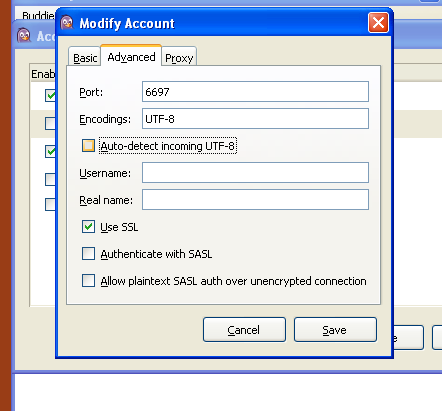
|
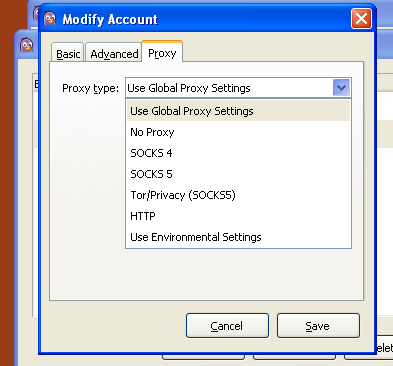
|
|
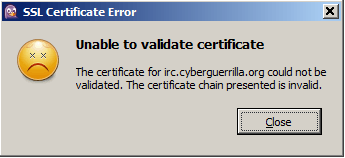 |
|
|
Connecting to I2P’s internal IRCNote: You must have installed I2P and had it running for around 24 hours before this will work. See on how to create a tunnel to go on the IRC through I2P
|
Installation and Configuration Irssi
The first step is to download irssi and the latest version of irssi-otr from irssi-otr homepage. The software author offers downloads via both HTTP and git. Download the latest version through your preferred method. Make sure you have the required packages installed: libotr, glib, irssi, cmake, pkg-config, python and wget. The INSTALL file details the requirements for these packages.
The below example demonstrates how to install irssi-otr downloaded via HTTP. If you downloaded irssi-otr with git, you do not need the “-DIRSSIOTR_VERSION” option in the “cmake” line. Make sure to put the appropriate version number.
% cd irssiotr
% cmake -DIRSSIOTR_VERSION=0.1 .
% make
% sudo make install
Once you have irssi-otr installed you need to load the module in irssi. This is accomplished by running a “/load otr” in the irssi interface. The first time you load OTR you need to create a OTR key. You do this by running the command “/otr genkey ” where “nick” is your IRC nickname and “irc.domain.xyz” is the IRC server’s fully qualified domain name. You confirm the creation of the key by looking in ~/irssi/otr/otr.key. After this, you simply need to write something in the chat room, wait 10 seconds and your communications should become secure. The README covers these commands and others. It is highly recommended you read this document and understand it before deploying irssi-otr.
- You can follow any responses to this entry through the .